

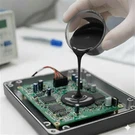




Figure 1. Representative illustration showing the general repair process of a failed one-part silicone sealant joint, including removal of old sealant, surface preparation, and reapplication under controlled conditions.
A failed one-part silicone sealant joint can be a common and frustrating issue in both everyday maintenance tasks and professional applications. Rather than indicating a single mistake, joint failure is often the result of multiple contributing factors. This article outlines typical causes of sealant joint failure and provides a general, step-by-step approach to repairing a one-part silicone sealant joint in a practical and controlled manner.
Understanding the Causes of Sealant Joint Failure
Before attempting any repair, identifying why the joint failed is an important first step. Common contributing factors include:
- Poor surface preparation: Contaminants such as dust, oil, or moisture can prevent proper adhesion.
- Incorrect application: Inconsistent bead size, insufficient coverage, or inadequate tooling may weaken the joint.
- Environmental exposure: Prolonged exposure to temperature extremes, humidity, UV radiation, or chemicals can degrade sealant performance over time.
- Mechanical stress: Vibration, movement, or thermal expansion and contraction may exceed the sealant's ability to accommodate joint movement.
Understanding these factors helps reduce the likelihood of repeated failure after repair.
Tools and Materials Needed
Repairing a failed one-part silicone sealant joint typically requires basic tools and materials, including:
- A utility knife or sealant remover for removing old sealant
- Sandpaper or a wire brush for surface conditioning
- A suitable cleaning solvent, such as isopropyl alcohol
- Clean, lint-free cloths
- Masking tape for edge control
- A caulking gun
- A compatible one-part silicone sealant
- A sealant smoothing tool or gloved finger
Step-by-Step Repair Process
Step 1: Remove the Old Sealant
All existing sealant should be completely removed. Any remaining residue can interfere with adhesion and compromise the repair. A utility knife or sealant remover may be used to carefully cut and scrape away old material. Stubborn residue can be addressed with mechanical brushing.
Step 2: Prepare the Surfaces
Once the joint is free of old sealant, lightly abrade the bonding surfaces if appropriate for the substrate. This can help improve mechanical adhesion. After abrasion, thoroughly clean the surfaces using a solvent and allow them to dry completely before proceeding.
Step 3: Apply Masking Tape
Masking tape can be applied along both sides of the joint to define the sealant line and help achieve a clean finish. Ensure the tape is firmly pressed down to prevent seepage.
Step 4: Apply the New Sealant
Load the sealant into a caulking gun and cut the nozzle to match the joint width. Apply a continuous, even bead of sealant along the joint, ensuring full contact with both sides.
Step 5: Smooth the Sealant
While the sealant is still uncured, smooth the bead using a suitable tool or gloved finger. This helps eliminate air pockets and ensures consistent contact across the joint.
Step 6: Remove the Masking Tape
Carefully remove the masking tape immediately after smoothing. Removing the tape before skin formation helps maintain clean joint edges.
Step 7: Allow Proper Curing
Allow the sealant to cure according to the manufacturer's recommendations. Curing time may vary depending on environmental conditions such as temperature and humidity. Avoid disturbing the joint during this period.
Quality Checks After Repair
After curing, visually inspect the joint for gaps, cracks, or uneven areas. For applications involving moisture exposure, a simple functional check-such as controlled water exposure-can help confirm sealing continuity.
Preventive Measures for Future Repairs
To reduce the risk of future joint failure:
- Follow recommended surface preparation and application guidelines
- Select a sealant appropriate for the specific environment and movement requirements
- Allow sufficient curing time before exposing the joint to stress
- Minimize exposure to harsh conditions where possible
Conclusion
Repairing a failed one-part silicone sealant joint is primarily a process of careful removal, surface preparation, controlled application, and adequate curing. While the steps themselves are straightforward, attention to detail plays a critical role in achieving a durable repair. Understanding why a joint failed initially can also help improve long-term reliability in future sealing applications.
References
Silicone Sealant Application Guide (general industry practices)
Published studies on the durability of one-part silicone sealants